banner

News

Home News

A Complete Guide To Globe Valve Installation And Repair

A Complete Guide To Globe Valve Installation And Repair
September 12, 2024

Globe valves are common piping components in a huge range of industrial settings. Their time-tested design makes them well-suited for throttling and frequent on/off flow control. But all valves eventually require maintenance or repairs. Let’s walk through the complete process of new globe valve installation best practices, tear down, troubleshooting common issues, and rebuilding globe valves to like-new condition.

What You’ll Learn

  • Globe valve anatomy and working principles
  • Proper globe valve installation and orientation
  • Diagnosing leaks and other faults
  • Step-by-step disassembly and inspection
  • Reassembling valves and returning to service

Once we cover the complete service process, you’ll have the knowledge to keep your globe valves in peak operating condition for decades of reliable flow control.

How Does a Globe Valve Work?

Before jumping into problems and looking for a globe valve repair kit, let’s briefly review how globe valves are constructed and control flow. This will make the later troubleshooting and component replacement steps much easier to grasp.

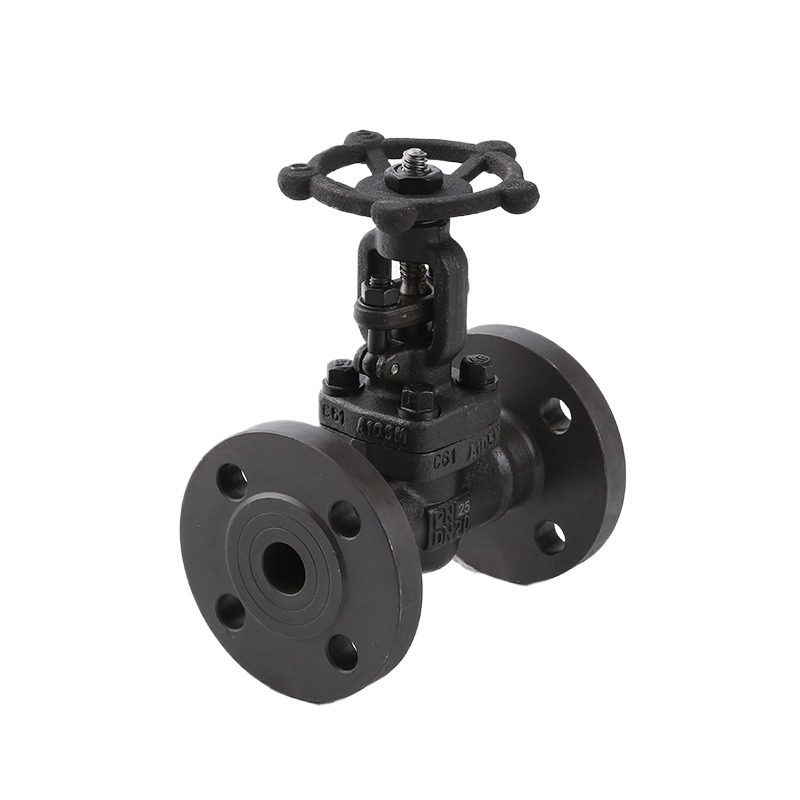
Globe valves have three primary sections:

  • Body – the central shell containing all internal components and flow passageway. Usually a two-piece bolted body.
  • Bonnet – the top section that screws onto the body and holds the disk/plug assembly and packing box.
  • Disk/plug – the movable regulating element connected to the stem. Raises or lowers to modulate flow.

Many interchangeable trim components then line the globe valve flow direction, including seats, guides, and disks/plugs tailored for specific applications.

To open and close, the handwheel turns the stem to raise and lower the disk/plug away from the seat. This permits or restricts flow through the valve body. Globe valves aren’t fully shut off until the disk hard seats against the body seat ring.

Proper Globe Valve Installation Configuration

Once you choose the optimal globe valve and trim for an application, next comes important globe valve installation considerations. The key is configuring the valve to allow proper disk movement and prevent fluid damage.

  1. Globe valve direction – Globe valves only work in one direction. An arrow on the body indicates proper flow. Always install with flow entering below the seat.
  2. Orientation – Valves operate best mounted horizontally with the handwheel upright. This allows the disk to fully close on the seat. Vertical mounting can impede full closure.
  3. Piping stresses – Use pipe hangers and supports to remove weight or side loads on the valve that could bend the body.
  4. Thermal relief – Allow space for valves with extended bonnets to expand/contract without touching other equipment. Consider bellows seal valves.
  5. Insulation – Never insulate over the bonnet or handwheel. This leads to overheating that damages packings and stems.

    Troubleshooting Common Globe Valve Problems

    Despite best globe valve installation practices, globe valves eventually develop issues from wear, contamination, or corrosion damage. Here are the most frequent problems:

    External Leakage

    Leaks coming from the bonnet gaskets or packing box during operation indicate worn seals. Tighten the packing gland nuts moderately – but repeated loosening/tightening accelerates packing wear. Major packing replacement may be needed.

    Also check body-bonnet gaskets if leakage appears between the two casing halves. Loose flange bolts can also cause leaks over time.

    Internal Leakage

    Fluid leaking out the valve outlet when fully closed signals internal damage. The disk likely isn’t fully sealed on the seat, allowing fluid to sneak by the sealing surfaces. This is a major issue requiring teardown to access internal parts.

    Other Faults

    Additional problems include stiff handwheel turning from scale/dirt buildup, noisy flow, and emissions from the bonnet. Binding stems and hard shutoff also eventually occur as friction-reducing lubricants are lost from the packing.

    Any of these operational changes indicate a need for inspection and rebuild. Catching problems early minimizes overall wear.

    Globe Valve Disassembly Process

    Once you’ve diagnosed an issue, it’s time to disassemble the globe valve for internal access. This requires meticulous organization of removed components. Follow these step-by-step guidelines:

    1. Isolate and depressurize the valve. Drain any trapped fluid. Remove insulation if present.
    2. Document original orientation and settings like handwheel position. Take photos for reference later.
    3. Unbolt and remove the bonnet from the body. Inspect gaskets for damage.
    4. Extract the plug/disk and stem assembly. Note shims or any special trim.
    5. Remove seats, guides, and other internal components from the body if present.
    6. Clean and degrease all parts if needed but don’t damage surfaces.

      Inspecting Internals and Planning Repairs

      Thoroughly examine each part removed during disassembly for:

      • Cracks – especially in threaded areas of the body/bonnet. May require welding repairs.
      • Erosion – from cavitation, flashing, or chemical damage. Replace affected parts.
      • Scale/deposits – buildup impeding function that may need cleaning.
      • Corrosion – pitting that can compromise integrity or sealing.
      • Wear – Look for scoring, galling, flattened seats, and loose stem fits.
      • Leak points – Note any specific sites allowing leakage.
      • Other defects – dents, missing pieces, misalignments, etc.

      Reassembling Globe Valves After Service

      Once all worn components are replaced, it’s time to carefully reassemble the globe valve in reverse order:

      1. Clean the body passage and seating surfaces of old gasket debris.
      2. Install new seat ring, guides, plug tip if used, and other internal trim.
      3. Insert the plug/disk onto the valve stem and attach to the body.
      4. Slide new packing and spacers onto the stem and insert into the stuffing box.
      5. Install new gasket and carefully mate the bonnet to the body. Tighten flange bolts.
      6. Adjust gland nuts and packing to slightly compress the box for leak-free stem seal.
      7. Check handwheel motion through full stroke. Lightly lubricate the stem and packing if needed.
      8. Return valve to original installed position. Pressurize and check for leaks during operation.
      9. Consider keeping spare gaskets, packing, and other parts on hand for future maintenance.

        Frequently Asked Questions – FAQs

        How to service a globe valve?

        Service globe valves by isolating, depressurizing, disassembling, cleaning, inspecting, replacing worn parts like seats and packings, then carefully reassembling.

        Should globe valve installation be vertical or horizontal?

        Install globe valves horizontally with handwheel upright for optimal disk movement and sealing. Vertical mounting can impede full closure.

        How to fix a stuck globe valve?

        Free stuck globe valves by injecting penetrating oil around the packing and stem, tapping the bonnet and handwheel with a mallet, and slowly working the handwheel back and forth. Severely stuck stems may require disassembly.

        Conclusion

        Globe valves are found everywhere from chemical plants to HVAC systems due to their proven performance for globe valve flow direction. But their moving parts eventually require servicing to maintain tight shutoff and hassle-free operation. Learning the steps for installing, troubleshooting, disassembling, repairing, and rebuilding globe valves will pay dividends for years of reliable service.
leave a message

leave a message
If you are interested in our products and want to know more details,please leave a message here,we will reply you as soon as we can.
submit

home

products

WhatsApp

CONTACT US